Wednesday, December 21, 2011

Day 4: Green

Well, I used the China Glaze "Near Dark" with Nails Inc. Holographic Topcoat. Ugh. Terrible. It lasted 24 hours? Something like that. China Glaze and I still have issues to work out. I'm trying to figure out what it is I'm doing wrong! It's frustrating!!!! Grrrr. I've just got to practice some more, I guess.

So, for my green mani, I used the Nails Inc. Wyndham collection.

I'll upload with pictures later, but I just thought I'd share a little post about what I'm wearing!

I'll be back to edit soon! :)

EDIT: January 10, 2012

First off, HAPPY NEW YEAR!!! I hope everyone has enjoyed their 2012 so far! Blogging around the holidays is so difficult because of all the things to do and places to be. So, without further ado, here is the Wyndham collection!

Forgive the terrible job. I had no nail polish remover to clean up the cuticle area...
This picture above shows a good color spectrum of the flakie. There's greens and blues and purples. The rest of the pictures say the same sort of things, so I'm just going to let you look at the pretties. :)


Blinded by the flash!!! Haha. This shows the greener, yellower tones. Maybe some orange too? 

From a different angle with lots of flash again. This shows more of the blue and purple.

Overall, I love this collection to death! It had great staying power too. Stayed on a whole week with only 2 chips!!

BASE
nails inc Kensington Caviar base coat
COLOR
nails inc Teal Black Kensington Polish
nails inc The Wyndham Overglaze Top Coat
TOP COAT
nails inc Kensington Caviar top coat

Monday, December 12, 2011

Day 3: Yellow!

Day 3 was the day for Yellow!

I took yellow and gave it a more "golden" spin for the autumnal season. I hope y'all like it!

And, unfortunately, the time when these photos were taken, it was during a 4 day rainy period, so I have no good pictures with sunshine.
:(

The final mani!

I'm trying to capture the awesomeness that's in this bottle!!!! 

 When you click on the photo for a larger image, you can see the multi-colored glitter that's in this gold!


And, because I can't leave well enough alone, giraffe spots and polka dots!!! 


Products used:

BASE
China Glaze Strong Adhesion Base Coat
COLORS
Sinful Colors - Pull Over (true yellow; first coat)
Sinful Colors - This Is It (shimmery gold; second coat)
FIRST TOP COAT
Sinful Colors - Quick Dry
KONAD COLOR
OPI - DS Radiance
POLKA DOTS
OPI - DS Original
Sally Hansen - Lightening
SECOND TOP COAT
Sally Hansen - Dries Instantly
FEAUX-NAD PLATE
M61


Coming up next is green!! It'll be a few days before I post it... But I know what I plan on doing. I just finished finals so I have a lot of "minor" things to do (for example, laundry, cleaning my room, re-potting plants, other things that take a back seat when graduate school is in full force). I plan on this design being very Christmas-y. I'm going to visit family this Thursday, so I need pretty nails! Right now, my nails are sittin' pretty with just OPI Nail Envy.

I plan to "bring on the green" with some China Glaze Near Dark. I picked up some small acrylic paints to test with, so be prepared for Christmas trees! I might try a little sponging too to make Near Dark more Christmas-tree like. It will be fun!!! I can't wait to paint and post pictures! Let's hope I don't do too terribly! :-/

Monday, November 28, 2011

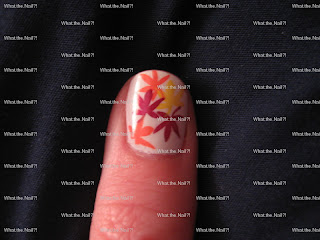
Day 2 - Orange Nails

Okay, so, I may have cheated a bit. I used this "orange" day for Thanksgiving. It's seasonal and appropriate, I thought. But, I also think I'm a bit of a cop out... I DESPISE the color orange, haha.

Here we are though...


BASE
Sally Hansen - Double Duty
COLORS
Sally Hansen Xtreme Wear - White On (base color for all nails)
Sally Hansen Insta-Dri - Wined Up (Leaves & Polka Dots)
Sally Hansen Insta-Dri - Snappy Sorbet (Leaves)
Sally Hansen Insta-Dri - Lightening (Leaves & Polka Dots)
Sally Hansen Insta-Dri - Mint Sprint (Polka Dots)
Sally Hansen Xtreme Wear - Crushed (Polka Dots)
Essie - Sexy Divide (Polka Dots)
TOP COAT
Seche Vite Fast Dry Top Coat
Feaux-Nad
Plate 47


Next up: Yellow! ...Yikes! haha.

I hope everyone had a wonderful Thanksgiving! :)

Wednesday, November 16, 2011

"Day" 1 - Red Nails

It's time for my "Day" 1 challenge! (As acknowledged in my previous post, I have neither the time or patience in my life to do a new challenge every single day, so I'm doing the challenges leisurely).

For this one, I used China Glaze's Ravishing, Dahling, along with the China Glaze Strong Adhesion base coat and Seche Vite Rapid Dry top coat.

The weather as of late has been MISERABLE. So please forgive my pictures. Also, I did a little stamping on my ring fingers because I got bored with plain red. I may edit this post in the future with a picture or two of me "editing" my nails for a better look; however, I've got a paper to do soon, so I need to really leave my nails ALONE! Haha. :)

Without further ado, here is Ravishing, Dahling!


This is a darker red, which is why I like it. It looks super, super dark in the bottle compared to what it looks like on your nails. I used 3 coats for the results in the pictures. I'm not sure about China Glaze. Their formula is weird or something. It's the first time I've used their polish though, so it may just take some getting used to. Additionally, I used Essie's Blanc for the stamping using Feaux-nad plate 63.

Next up is orange and I have NO idea what to do with orange... I actually hate orange, haha.

Have a good week everyone!! :)

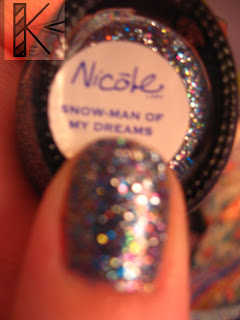
Nicole by OPI - Snow-Man of My Dreams

Hello everyone! Busy time has struck again, so I've been paying less attention to my nails than normal. I do have 2 posts for tonight though! This first one is Nicole by OPI's Snow-Man of My Dreams.

It's a glitter polish in a clear base. The glitter is mainly blue and silver, but there's also some orange, yellow/gold, green and fuchsia. I got TONS of comments on this polish, and I really love it myself. Problem is, I used a *terrible* base coat (some NeutraNail something or something, I forgot already...). But, the point is, it was terrible. So I hope to use this again soon with a proper base coat.

Time to let the pictures speak for themselves!!!

 For whatever reason, I decided to take pictures in the dark first. The dim light from my netbook screen made the polish look awesome!!

 This is under fluorescent light.
 This is not focused on purpose... See all the different colors ranging from silver to pink to orange to blue to green to yellow/gold?! Beautiful!


 Sunlight photos! They really sparked out in the sunshine! :)


I picked this up at my local Target. I'm not that interested in any others in the collection... Okay, well, I'm interested, but I don't need to buy any more nail polish for a while! :)

Overall, this polish looks great for holidays. It almost reminds me of a snow globe. Hope y'all enjoyed!

Oh yes, I should note... I've decided to do the "31 Day Nail Challenge". However, I have neither the time or patience to actually do a different challenge EVERY day. So, my next 31 manicures will come from this list (except maybe around the holiday season coming up, but we'll see!!!).

Here's the list:


I'm about ready to post my red one for "Day" 1!

Wednesday, November 2, 2011

Halloween!!!

This manicure is minutes from going away, haha. It was okay to wear today I think, but it'll be a little out-of-date tomorrow (and I've gotten aggravated with it and peeled some of it off in class... eek again). Oh, and these pictures are FINALLY with my REAL camera! Be excited!!! XD

So, this is with Nfu Oh GS 14. I really got annoyed with applying it. So I've decided that next time, it's going over a black base with just 1 layer of GS 14. It was seriously grainy and took 2 to 4 top coat layers to get it smooth. NOT AWESOME. But, at the same time, this polish was totally worth it! It's absolutely stunning. My pictures don't do it justice at all.

As a base, I used Sinful Colors 902 base coat (I noticed one of their polishes, Unicorn, bled a lot on my nail so I use it now when I think my nail has the chance of being tinted by a polish. It's done an awesome job!). Nfu Oh GS 14 on all nails but my ring fingers. On my ring fingers, I used Sally Hansen Xtreme Wear - Crushed. I also used a few accent stickers by the company Joby (found them on Amazon).

Here are the pictures!

Camera on auto with flash. You can see a few sparkles of Nfu Oh. 

Macro setting with flash. This is probably the most realistic of how you'd see it in indoor settings. 

Macro setting without flash. In indoor light. 

Right hand - Macro setting; no flash. 

 Right hand - Macro setting; with flash.

Outside trying to capture shiny! 

Outside still trying to catch some holo action! Haha.

So, this was my Halloween mani that's coming off in 5... 4... 3... 

How was y'all's Halloween? Did y'all do anything crazy with your nails?

Disney Mani!!

So, let me tell you, I was super excited to do a Disney mani. I LOVE Disney. From Snow White to Pirates, love, love, Love, Love, LOVE!!!

I'll get the boring stuff done with first... Nails, colors, and bases... But first, the pattern is the patchwork mani! (If y'all haven't been to the Chloe's Nails blog before, beware! Haha. Some great designs and colors going on and you'll be spending like crazy!)

So here we go with boring-ness...
Thumb (no theme, just purple):
Base - OPI Nail Envy
OPI Planks A Lot (Love this color!!)
OPI DS Original
Essie Sexy Divide

Pointer (Cinderella):
Base - Essie's Fill the Gap
Essie Coat Azure
Essie Loophole
Sinful Colors Midnight Blue

Middle (Belle):
Base: Sinful Colors Basecoat 902
Sinful Colors Unicorn
Essie After Sex
Sinful Colors Tokyo Pearl

Ring (Jasmine, but Tiana works too):
Base: Sinful Colors 902
Sinful Colors This Is It (this is a beautiful color, btw! It has little holos in it!!)
Sinful Colors Rise and Shine
Essie Blanc

Pinky (Aurora)
Base: Essie Fill the Gap
Essie French Affair
Sinful Colors 24/7
Essie Watermelon


So, voila! There we have it! The first picture is the Friday following the day I did the mani - I was bored in the airport. The next ones are also in the airport 4 days later!!! I didn't do ANYTHING to my nails to maintain them. There was slight tip wear, but I didn't reapply a topcoat or anything! No babying at all on vacation. Of course, I didn't do dishes or anything on vacation either. This manicure stayed awesome!... Until I bumped one of my nails on my luggage. Then I peeled it off (eek). So, there we have it!

Anyone have any other themed manis that are their favorites?? Have a good week!

Tuesday, November 1, 2011

Nails Inc - The Thames and Nfu Oh 054

Hello everyone!

Well, my apologies. I've delayed posting for quite some time! But, do not fear. I have 3 different posts for tonight! Over-compensating? Yes, I am. Haha. :)

This first one I absolutely love. I caved in, as I said earlier, and got the Nails Inc Neutrals from Sephora. In this specific mani, I used "The Thames" which is a beautiful "concrete grey" (I think they call it). After getting bored with it after a couple days, I decided to see what it would look like with Nfu Oh 054 over it. Beautiful. I'll let the pictures do the talking! (Although it won't be much talking because it's from my cell phone camera... :( ...)

Here's "The Thames" all on its own. This polish went on so well!! Beautiful glossy finish too!

And here it is with Nfu Oh 054 - 1 thin layer. My cellphone didn't capture its wonderfulness!


P.S. I changed the name of my blog from New2Nails to "What the Nail?!" recently. So previous posts that have New2Nails in the photos ARE NOT stolen. They are mine; I thought "What the Nail?!" was more exciting than "New2Nails"... A girl can change her mind right?! :P

I hope to use Nfu Oh 054 again over "The Thames", and I'll use my real camera next time!!

Oh yes, before I forget... I used the Nails Inc Kensington Caviar basecoat. It was okay. Didn't really fill any ridges or anything, but it did hold up pretty well. I used 2 coats of "The Thames". Topped it off with Seche Vite Quick Dry Top Coat. Then later a thin layer of Nfu Oh 054 followed by another topping of Seche Vite.

I love flakies! What do y'all think?

Thursday, October 20, 2011

Busy, busy!

Hey everyone....

Sorry for the not posting in a while thing going on! I've been busy, and I've been without a camera due to someone borrowing it. I'll hopefully post a real post tomorrow and include 2 manis? Maybe? Haha. I'm going on vacation to Disney soon, so I'm trying to have an awesome Disney mani to come with me!

The pictures of my last mani will be pretty rough... With my camera gone, I've been left with just the camera on my phone. My last mani was pretty if I don't say so myself! I caved and got the Nails Inc. neutral set from Sephora. Since I *thought* I was going to be interviewing for a job, I went with "The Thames" (described as a dark cement grey). It's a gorgeous color, but more about it tomorrow.

I also was reading some other nail blogs for other ideas. I read about some Nfu Oh flakies and I was doomed. I ended up getting 44 and 54. As well as Nfu Oh GS14. More later!

Monday, October 10, 2011

USA, Patriotic Manicure

Hello everyone! :)

Well, time has come for another update. On Friday (late) night, I was glued to Facebook and Universal Sports because of gymnastics. I'm a HUGE gymnastics fan (being a former gymnast myself), and World Championships are taking place until the 16th in Tokyo, Japan. The women sit atop the podium over Russia and China (who is the defending Olympic champion); the men are second behind Japan and over Germany who's in third.

In honor of the women's success (no sexism here, haha; the men hadn't competed yet), I decided my next water marbling attempt would be red, white, and blue for Team USA! I followed typical water marbling steps, and this is what I came up with!


My left hand! I learned on my thumb you have to be super careful and let the design sit for a while before you apply topcoat. Honestly, I just like my pointer finger on my left hand. My ring finger reminded me of a T-bone steak, haha.


My right hand is making an appearance! Haha. I like my right hand a lot better because of the minimal designs going on (with that said, my middle finger and thumb are my least favorite on this hand).

Overall, this was a little time consuming, but fun. For colors I used:
Base: Essie Fill the Gap
Red: Chi (Ceramic) Muy Caliente
White: Essie Blanc
Blue: Milani Bolting Blue
Original Top Coat: Seche Vite Dry Fast Top Coat

It may be the polishes I use or the essence of water marbling, I'm not sure, but this has been chipping from day 1 - Saturday. Sunday, it didn't chip so much, but I redid the topcoat and wrapped my tips with Essie's No Chips Ahead Saturday night.

Also, as I went along, I found that the white just doesn't look good as the main color. I think the red and blue stand out more with just a touch of white (like my pinky and ring finger on my right hand, pointer on my left). Maybe that's just me though. I wish it showed up more, but I really like the little white blaze on my pointer finger, right hand. Actually, it does show up, it just looks like glare. Also, some of the Chi Muy Caliente tended to swirl in the Blanc in the water... Not cool!

This was a fun experience, but I feel like I spent a little too much time on them being perfect for them not to last longer. I'll probably redo my nails tomorrow. But, I'll know next time to just suck it up and not care as much about how perfect or not perfect they are. Between you and me though, that'll be hard seeing as I'm a perfectionist!!! :)

Addition: I label this as a USA manicure, but it can be used by all countries with red, white, and blue as their colors.

Happy manicures everyone!